IOD
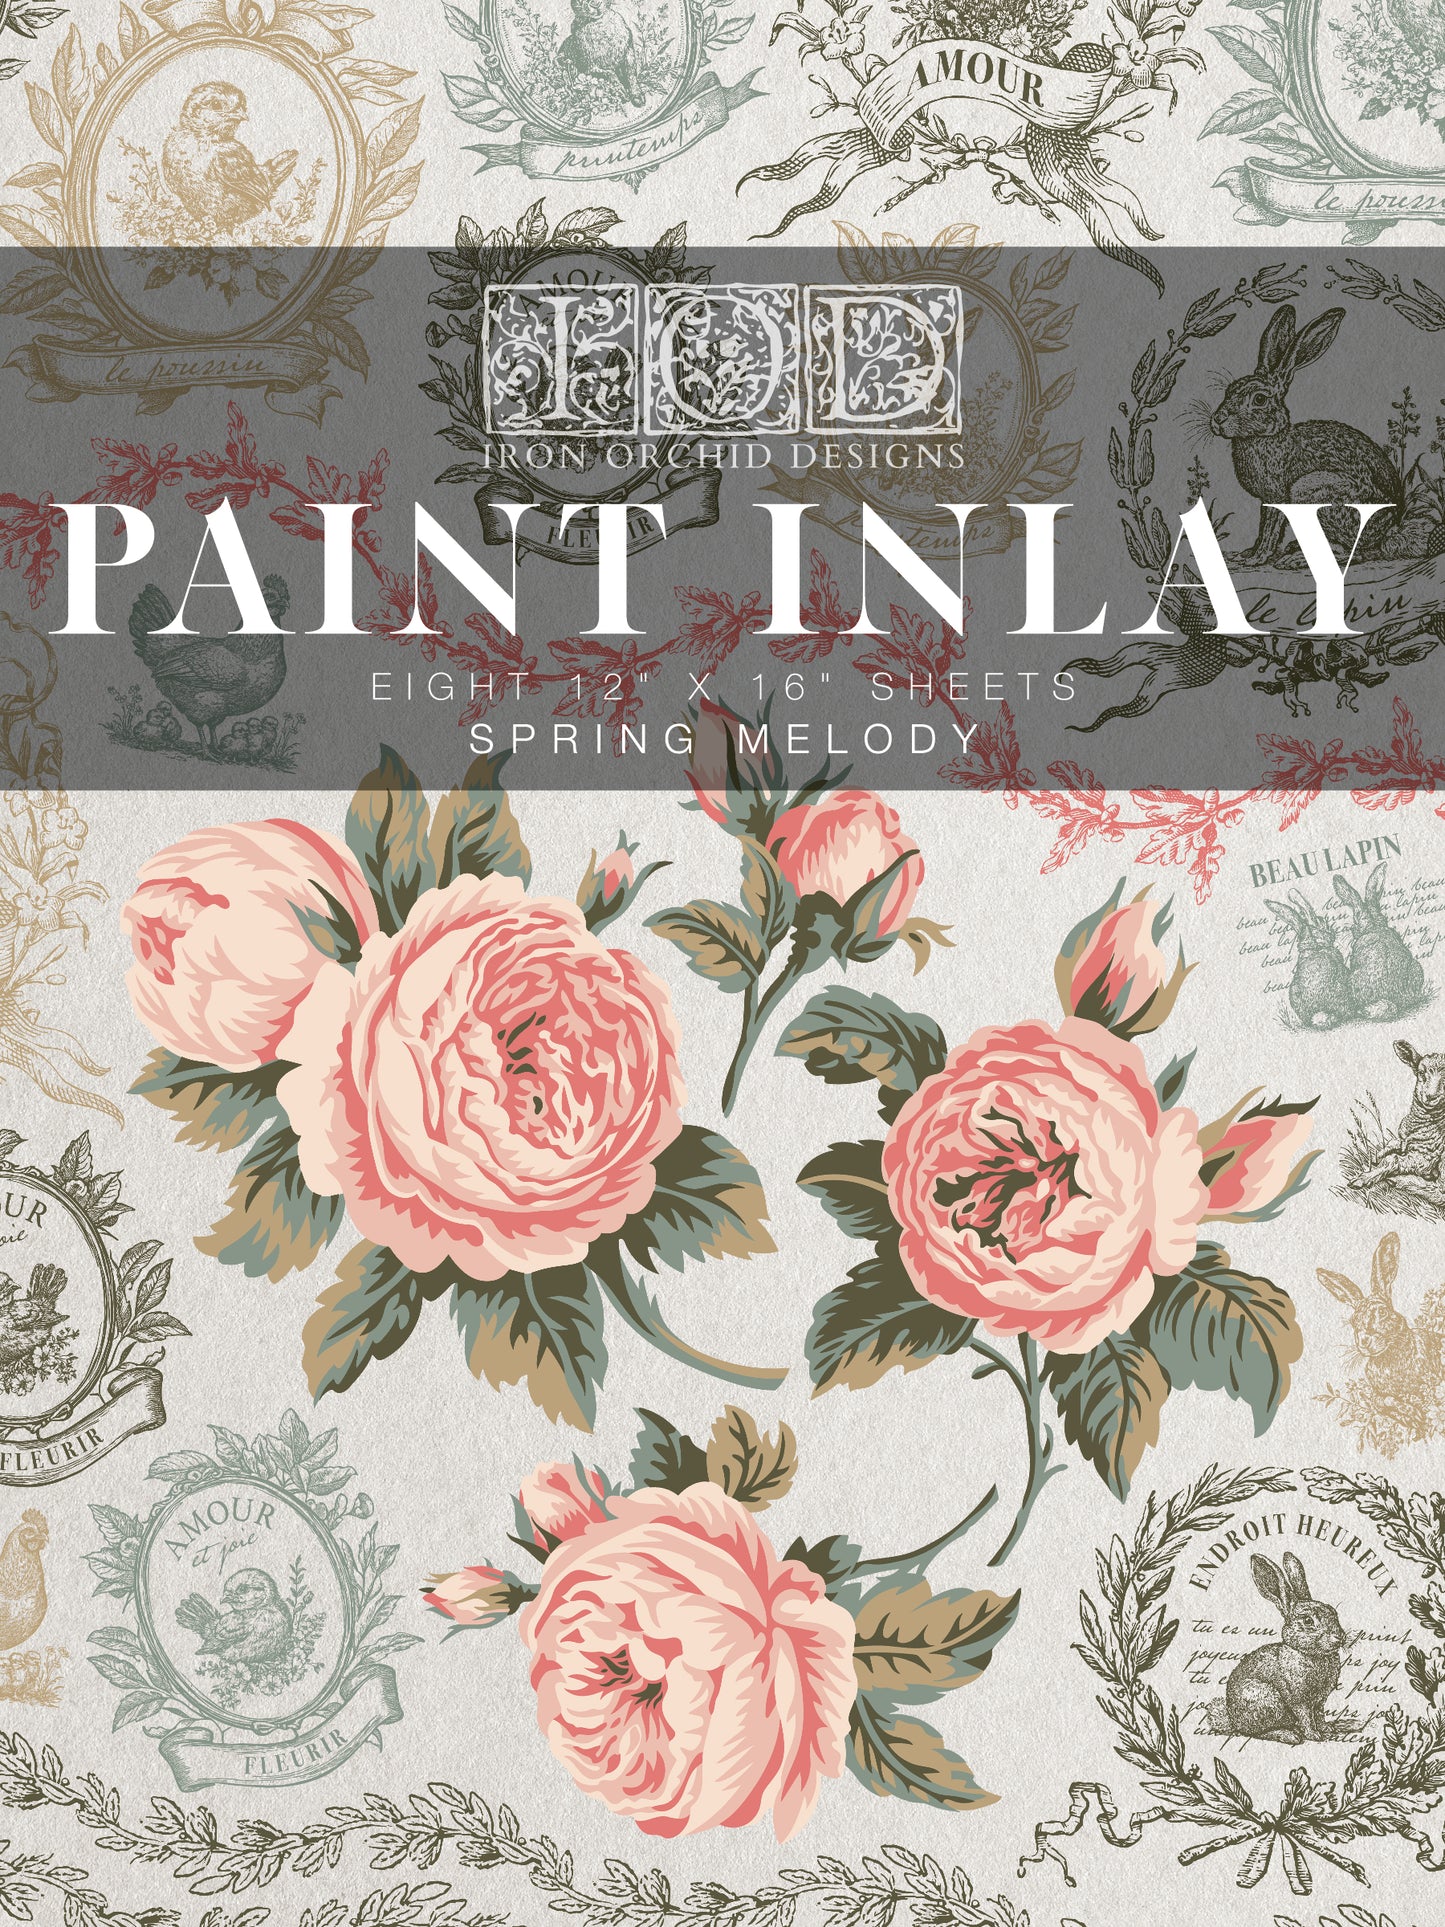
Spring Melody IOD Paint Inlay 12x16 Pad - IRON ORCHID DESIGNS 2025 Q1 Limited Edition
Spring Melody IOD Paint Inlay 12x16 Pad - IRON ORCHID DESIGNS 2025 Q1 Limited Edition
Couldn't load pickup availability
Watch The Paint Inlay How To Video From the IOD Sisters!
Spring Melody
Say hello to Spring Melody! This paint inlay design was intended to be unapologetically Spring Pretty and we are simply OBSESSED! Think whimsical vignettes, sweet borders, and breathtaking clusters of pretty patterns that mix well and scale with perfect versatility. This one was inspired by a heartfelt request for something with sweetness and bunnies from our dear friend Julie Borne at Julie’s Designs and Signs.♥️
The pale green and soft pink color palette is quintessentially spring and brings in the English countryside vibes with a bunny toile and dainty crests. You could create the most magnificent English tea tablescape with this collection!
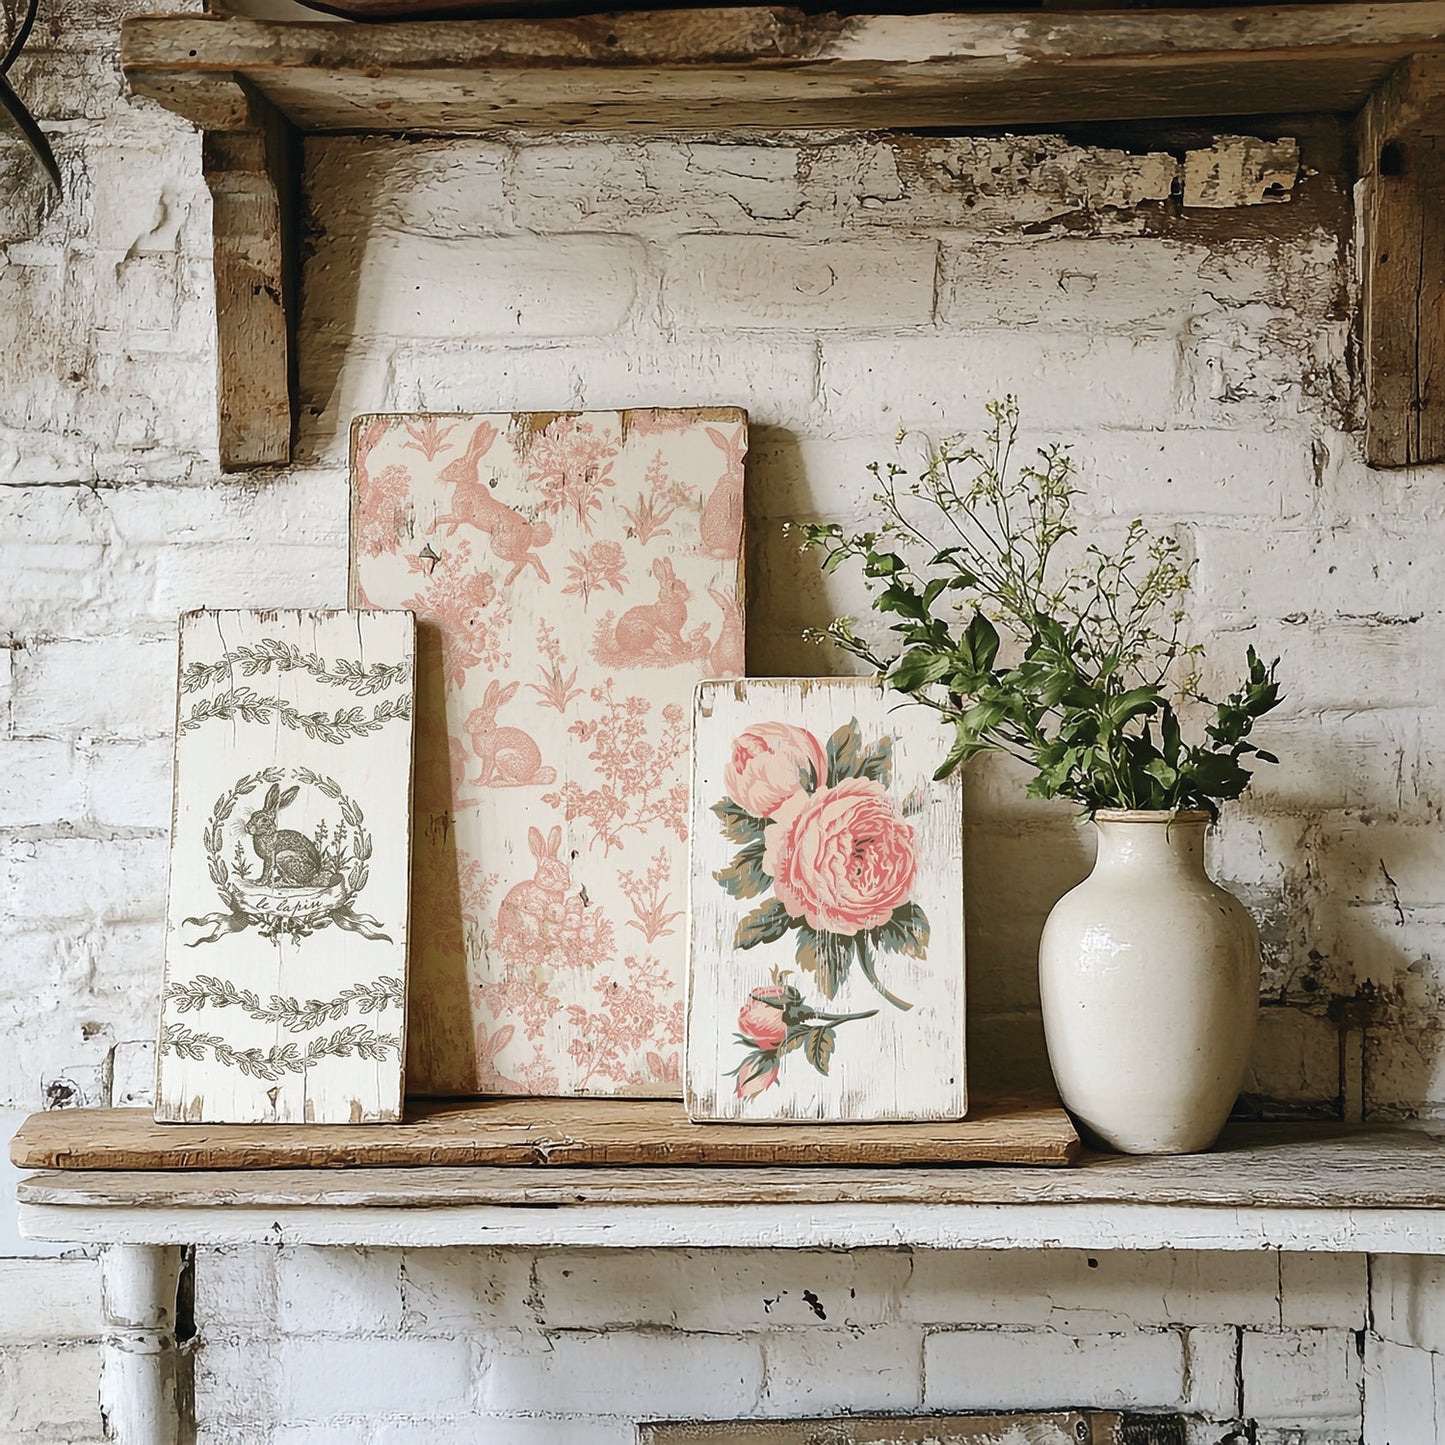
Imagine those sweet rabbits on small décor and mixed media or bold, breathtaking statements with clusters of roses on a vintage dresser.
Project Suggestions:
-
Small Decor: Whimsy motifs on children’s furniture, cutting boards, rolling pins, or ceramic planters.
-
Wall Art: Framed bunnies or clustered roses, mini-gallery,
Pair With:
-
Vintage Textures stamp
-
Kindest regards stamp
-
Le Courrier stamp
Handy Tip: Don’t forget that you can get more than one use from the IOD Paint Inlay sheets! Sally loves to batch holiday projects by making at least two at a time, so she has one to gift and one to keep.
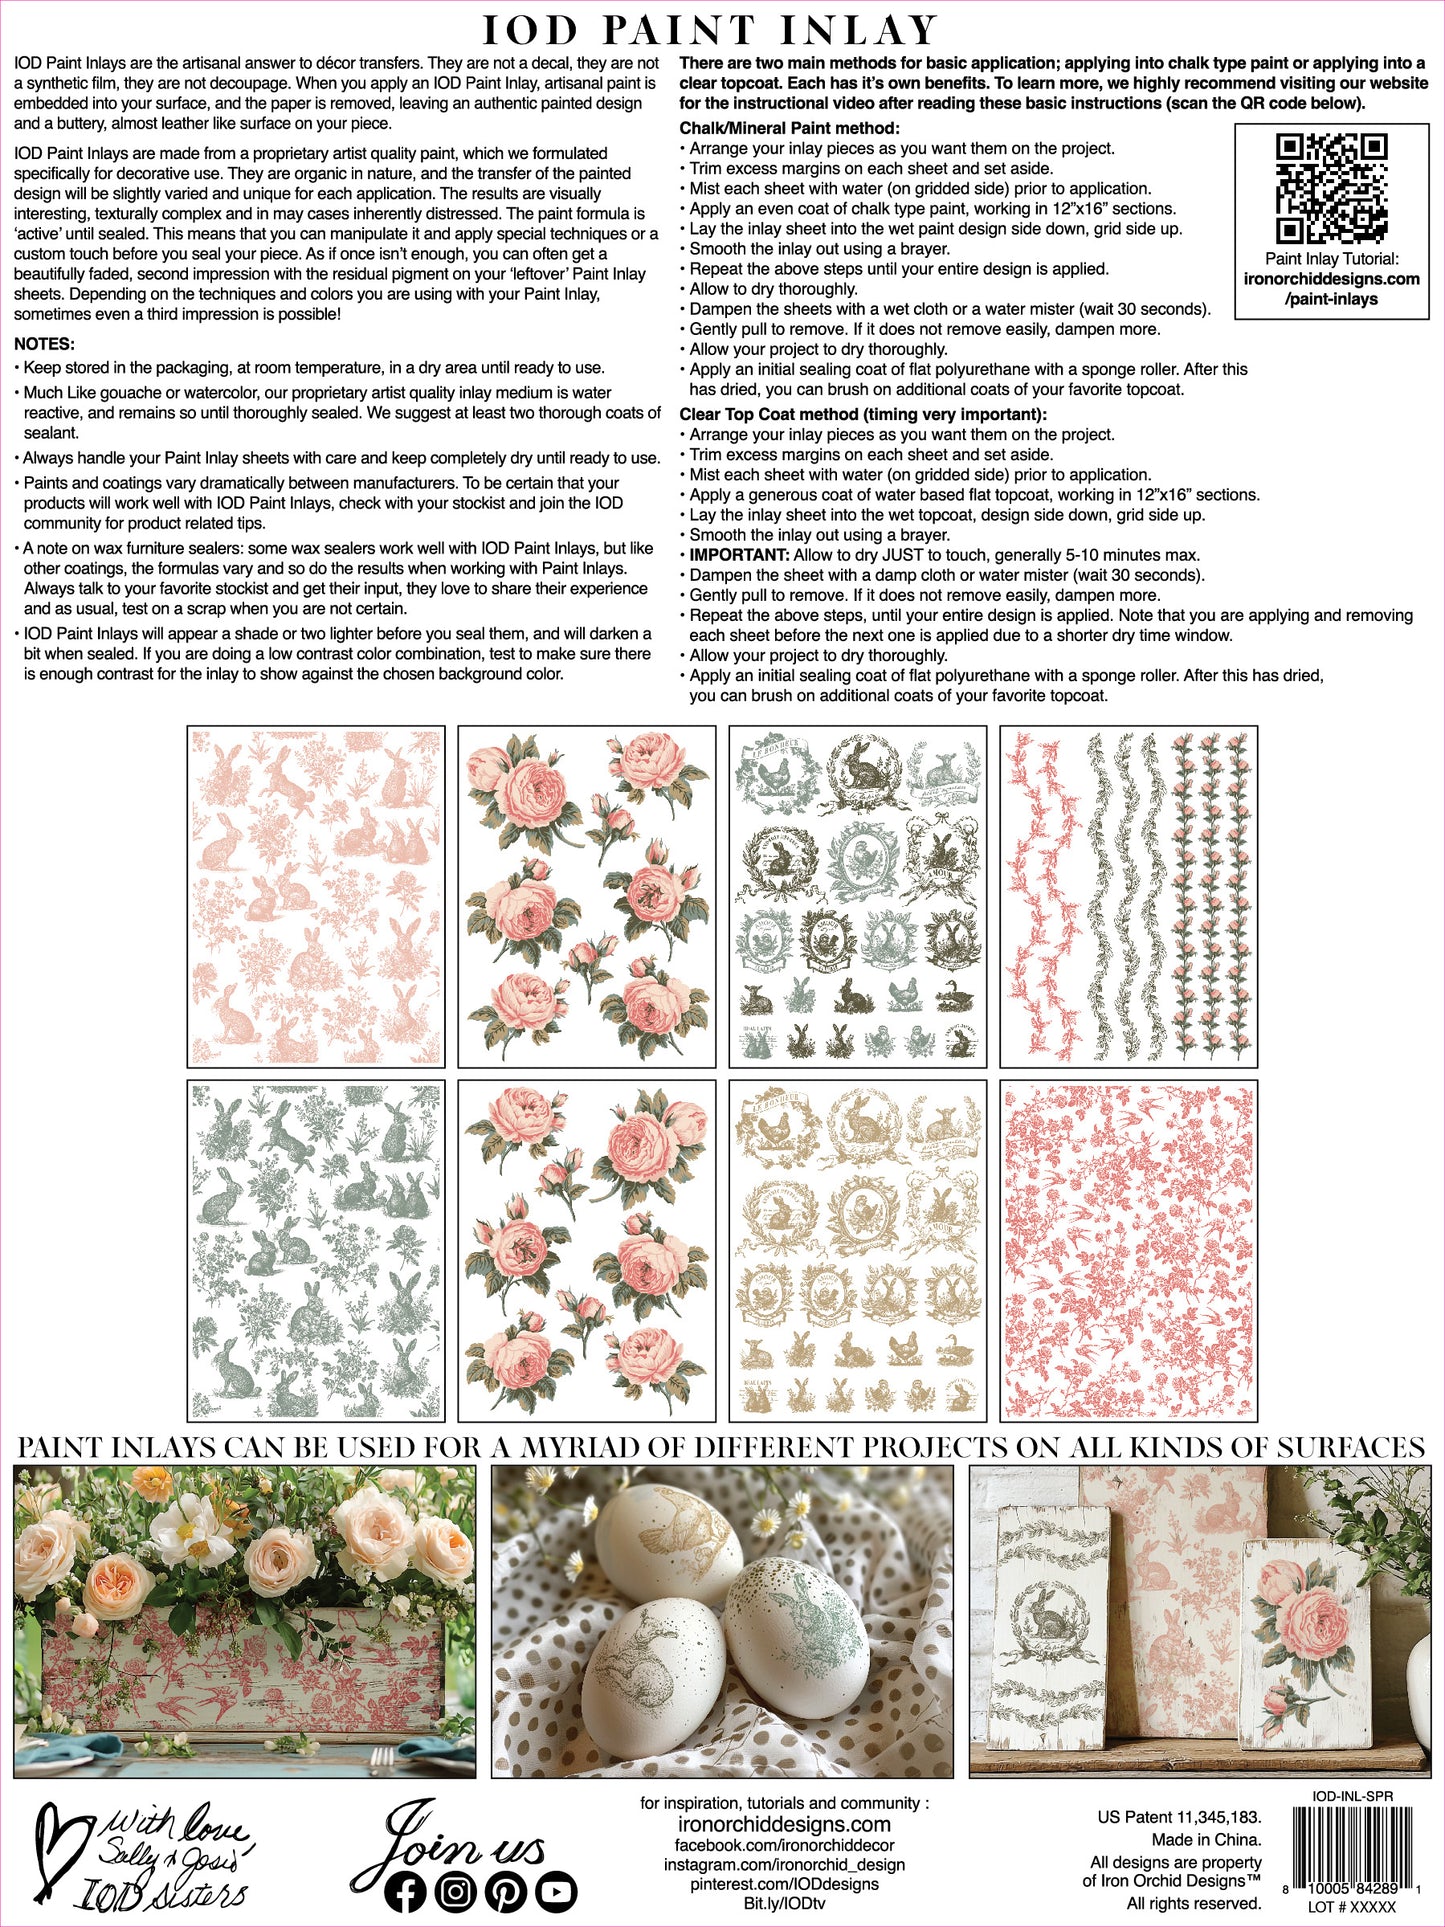
When you apply an IOD paint inlay, artisanal paint is embedded into your service in the paper is removed, leaving an authentic painted design and a buttery almost leather like surface on your piece. IOD paint and lays are made from a proprietary artist quality paint which we formulated specifically for decorative use. They are organic in nature and the transfer of the painted design will be slightly varied and unique for each individual. The results are visually interesting, texturally complex, and often inherently distressed. The paint formula is active until sealed. That means that you can manipulate it and apply special techniques or a custom touch before you seal your piece. And, as if once isn't enough, you can often get a beautifully faded second impression, with a residual pigment on your left over inlay sheets. Depending on the techniques and colors you're using with your paint inlay, sometimes you can even get a third impression! An important note: for the best results with a basic application, use a chalk type paint that does not contain polymers.
Share